Visibility and recognition in today’s overcrowded market are things every brand strives for. However, delivering a consistent and compelling message across one’s creative assets is not an easy task to achieve, especially when the team is larger than (yes) one member.
When you don’t have a system that helps you keep your brand assets always on hand and easy to manage, preferably in the same platform you create your designs with, you may end up with unwanted variations.
We set out on our product development journey with this universal need for brand alignment in mind, making the brand kit feature one of the key functionalities included in the first version of our design platform.
The updates you’ll find in the second version of the brand kit feature cater to an overall faster experience due to a more streamlined user flow and added customization functionalities for templates and color palettes.
If you are new to Creatopy, I advise you to take some time and go over the next section, Getting started with Brand Kits, so you get a general idea of what the feature is about.
In case you are already familiar with our platform, skip this part and jump right to What’s new about the Brand Kit feature.
Getting Started With Brand Kits
You can create your first brand kit using the dedicated tab on the bottom left of your dashboard.
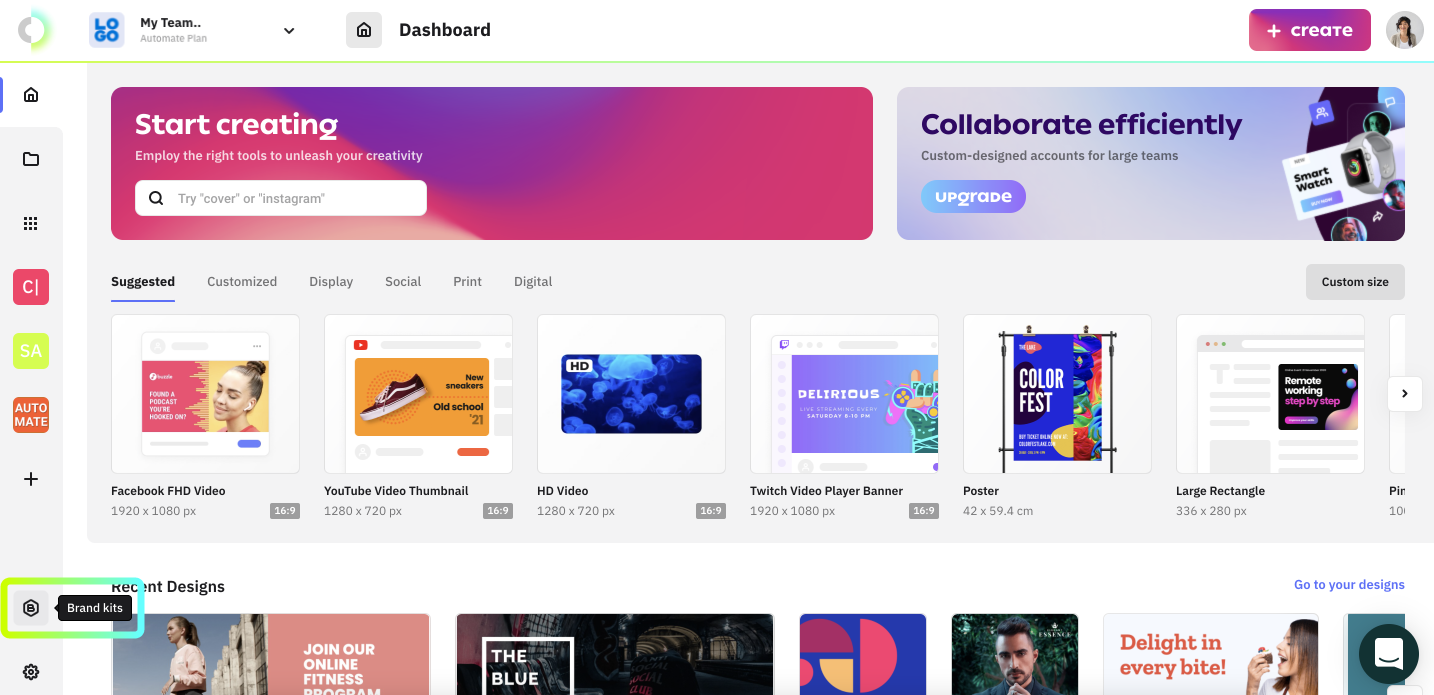
Once you click the icon, you’ll access your brand kit library. By default, a brand kit will automatically be created for you, so you can start customizing it at this point by changing its name.
The free plan allows a single brand kit per user, while paid plans go from three (for the Create plan) to unlimited kits per account (for the Automate plan). In case your projects require more than one kit, this is where you’ll be able to view and manage all of them.
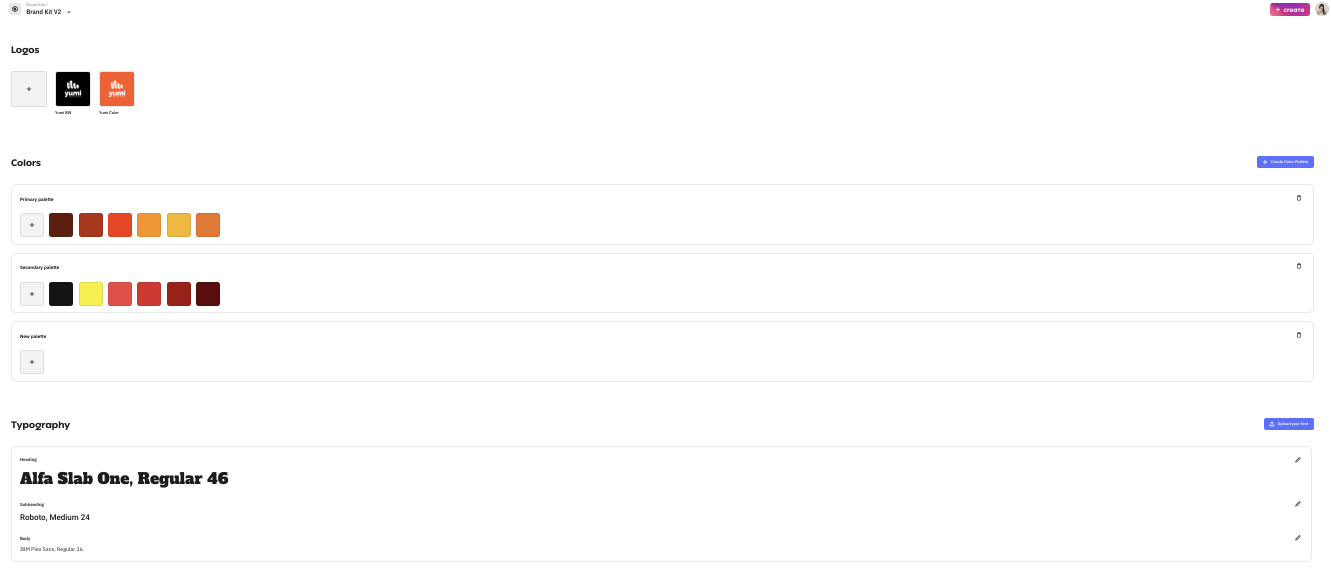
Clicking the brand kit card will take you to a new view, where you can upload your brand assets, such as:
- Logos. Upload multiple versions of your logo, up to 10MB. The accepted formats are SVG, JPG, JPEG, and PNG.
- Color palettes. Create up to ten color palettes with up to 30 colors each so that you have 300 brand-approved shades at your fingertips anytime.
- Typography. Explore the library of fonts and select those that tune in best with your brand. Or, you can upload and manage your font just as easily.
- Licensed elements. Upload your custom brand assets such as photos, jingles, ready-made designs, illustrations, or vectors. The accepted formats are JPG, JPEG, PNG, GIF, MP4, and SVG.
At this point, you either allot the brand kit to one of your projects, if you are working in a team, or you can simply start designing.
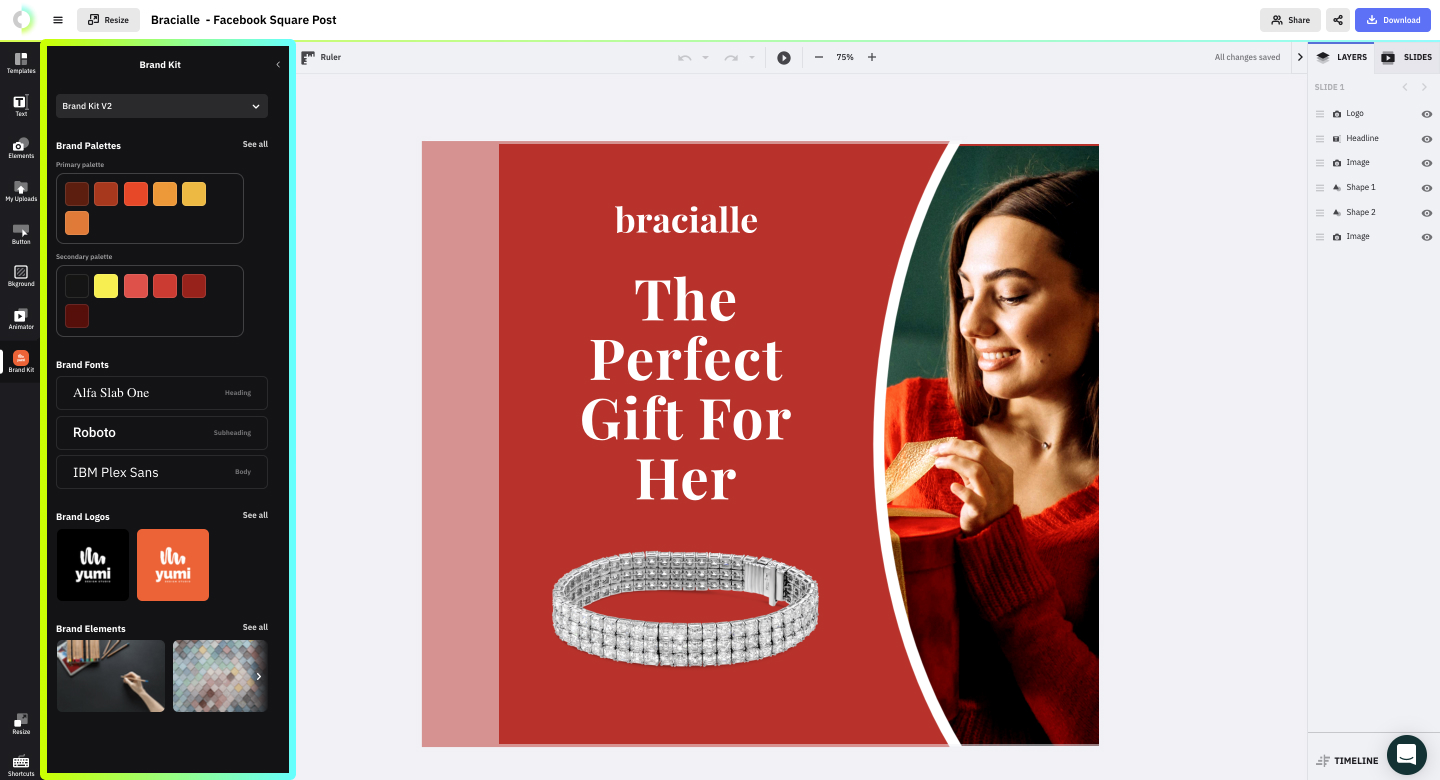
Select a size from the library, choose a template, or create from a blank canvas, and open your project in the editor, where you’ll find your brand kit on the left-hand menu.
What’s New About the Brand Kit Feature
1. Faster creative process
In the first version of the brand kit feature, the brand assets were divided among the corresponding Elements tabs in the editor. The actual version of this feature brings a simplified workflow by having all the brand kit elements in one place, thus reducing creative development to a few clicks.
Now, when accessing the Brand kit tab, you are not only able to visualize all the sections of the brand kit while editing but also automatically apply colors, fonts, and assets from the brand kit, both in the editor and generator.
Clicking on the See all option in any of the four categories of your brand kit will take you to detailed areas, where you can view all the assets in those specific sections.
2. Smarter customization of stock content
Each brand palette now has a shuffle functionality added to it. If you have a design on stage and click the shuffle button, a random combination of colors from your brand palette will be generated and added for each layer with a color attribute, except for gradients and illustrations.
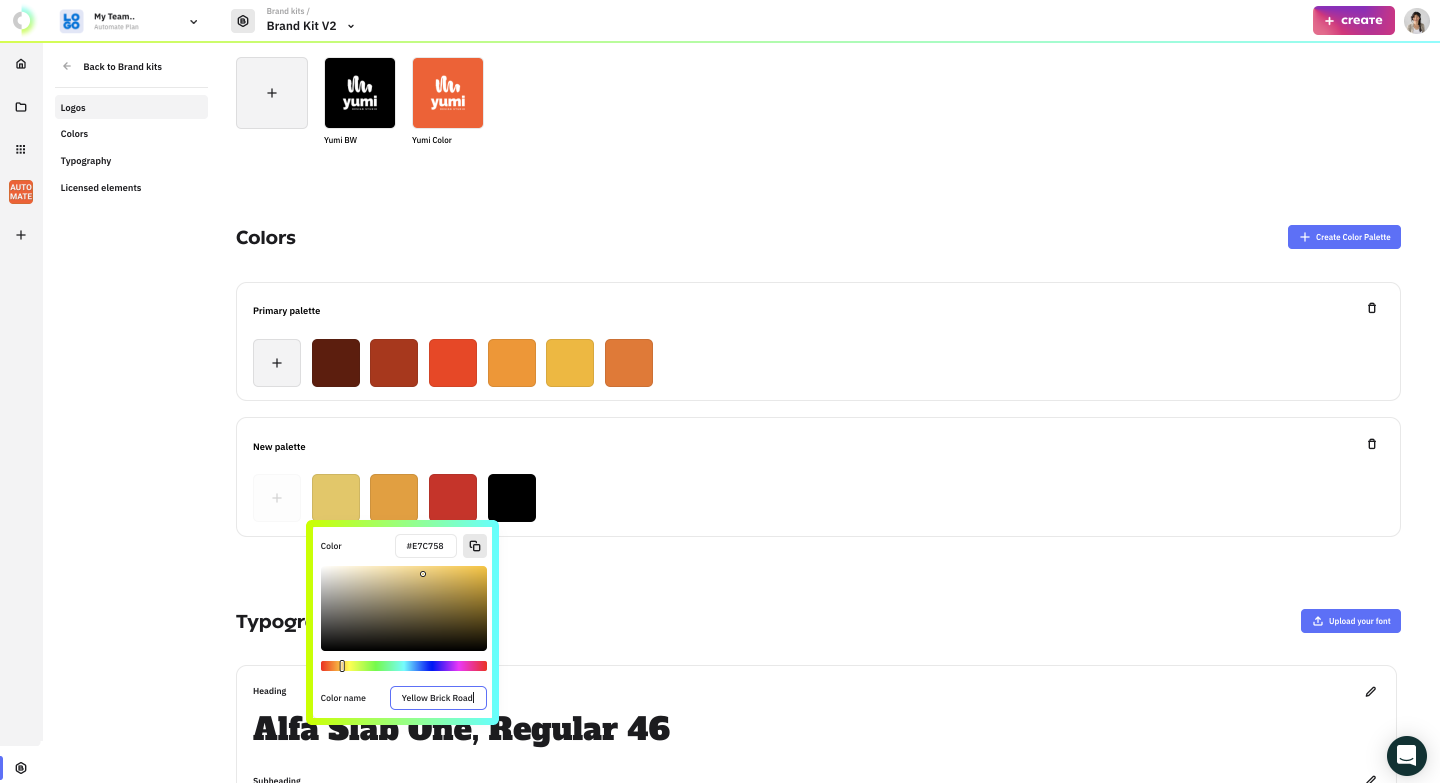
3. Simpler color identification
A naming functionality has been added to the colors in the brand palettes, enabling users to rapidly identify the appropriate shades when using the editor or generator.
Color names can be easily set or changed while using the color picker tool and will be visible upon mouse hover when working on your design in the editor or generator.
Now It’s Easier to Stay on-Brand
All that’s left is to log into your account, try the new functionalities, and let us know what you think via live chat or on our social media channels.