


Designing a nice banner ad is only one part of having a successful campaign. And definitely not enough. The other important aspect is getting in front of an audience. Or, more exactly, in front of the right audience. Without that, your banner would be just… nice.
This is one of the biggest mistakes we, marketers and entrepreneurs make. We’ve all been there, myself included, we’ve all made these mistakes and probably still make some occasionally.
This is why, in this article, we’ll walk you through some Facebook and Google advertising tips and tricks that will help you maximize your sales by getting your banner ads in front of the right audience.
Use Google and Facebook together to make your ads less obtrusive and laser target your audience
Banners are an interruptive way of advertising and this is why sometimes they are inefficient. Let’s take ourselves for example. You’re just checking out what your friends are doing on Facebook and then an ad with Buy running shoes pops out on your screen. We all know how “good” it feels, right?
But, what if you could make your banners less obtrusive and more efficient by displaying them on Facebook to those who already searched for your product, and to find even more potential clients like the ones mentioned earlier?
Here’s what I mean and how to implement this advertising strategy in 2 easy steps.
STEP 1: Get interested clients on your website using Google Search Ads
This step is when you solve the problem we’ve talked about a little bit earlier: you make sure you talk to people who want your product.
Let’s say you sell running shoes. You set up an ad on Google Search targeting specific keywords like blue men running shoes, blue women running shoes etc. It’s important to be as specific as possible. We’ll see a little bit later why.
Now you got people on your website on your running shoes page. But the problem is people don’t convert as we would like to, right?
That’s why we need to implement the next step.
STEP 2: Use Facebook Pixel to laser target your audience
Here’s where your banners come into play. You managed to draw to your website only people interested in your product – men or women searching for blue running shoes. But since the conversion rate on a first visit is very low, since most of them are still comparing, we must make sure that we stay on top of their mind when they’re thinking about buying those running shoes.
Here’s how.
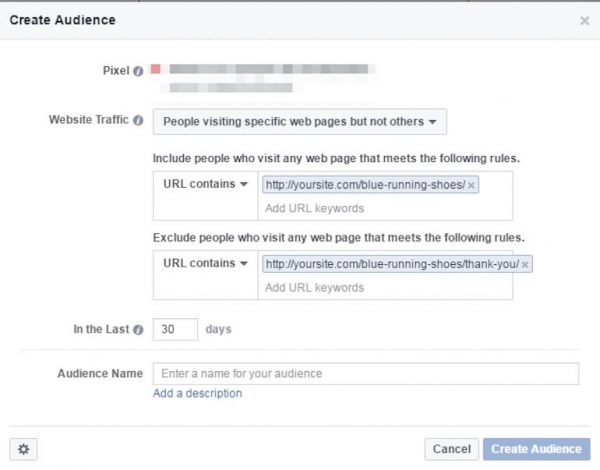
First, before even setting the Google Ads campaign, make sure you have installed the Facebook Pixel on your website(since you’re an awesome marketer I’m sure you have already installed it so I won’t go into detail here). Go to Facebook’s ad manager and create a Custom Audience. Further, choose Website traffic, and then choose the option People visiting specific web pages but not others. Here you can choose to show your banner to people who landed on your blue running shoes for men or women page, but didn’t purchase (they didn’t get to the “Thank you!” page).

How is this step helping you?
For example, now you can show a banner only to people who are interested in your product. And you can offer an incentive, like offering a discount.
But this can also be done with Google Display Ads, right?
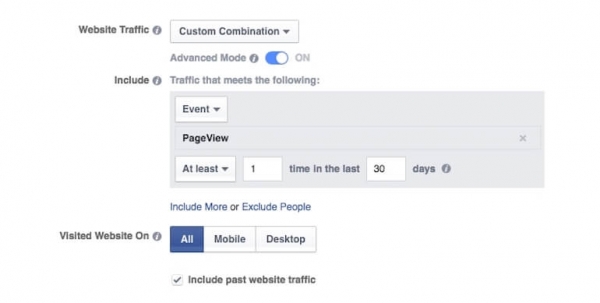
Well, from May 2016, Facebook has got some new tricks. You can target people who have visited a certain URL a certain number of times.

Jon Loomer wrote more about this. Or you can also read about it on Facebook help.
STEP 3: Use Facebook to find more of your ideal customers with “Lookalike”
Using Google Ads and Facebook you have narrowed down your audience. You have found people who have already searched for your product and manifested certain behaviors. Basically, you have defined your buyer persona. Now, it’s time to scale things up.
On Facebook, you can choose the option Lookalike audience. This option allows you to show your banner to more people who are similar to your most valuable audiences (to your custom audience which you defined earlier).
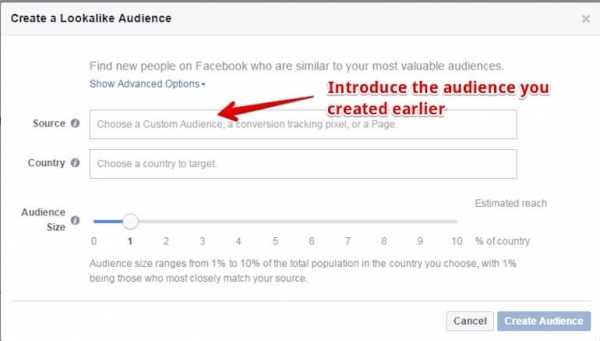

Continuing with the example above, this means that Facebook will search for people who have similar interests and behaviors to those who have visited your website and have ages between X and Y (ages you defined earlier) and so on. This will allow you to reach more people who are very likely on the verge of becoming your customers.
STEP 4: Use Google Display targeting options network to make your banner complete the puzzle
In marketing based on interruption, such as banners, you don’t fight only with other brands, you fight with people’s attention too. On Facebook, for example, your banner will probably “fight” with pictures of cats and dogs doing funny things or, well, just being cats and dogs…
This is why, a little bit earlier, we saw how to use Facebook to show our banners only to those who already searched for our product.
But even with this advertising “trick”, on Facebook, your banner still doesn’t fit 100% between pictures with cats and dogs and your friends’ check-ins. The problem is that most of the “views” that we see on Facebook Ads reports are not real views. Some of those views are people who scrolled so fast that if it existed a Facebook Timeline Police, they would get a fine for speed scrolling. What are the chances that they’ve really seen your Ad?
On Google Display Network, however, with a little bit of filtering, you could display your banner to those who are most probably interested in your product. And, besides that, if you do your targeting right, your banner can sit in front of your potential customer for a few good minutes while they read an article. Not just 0.01 seconds that they see it on Facebook.
For example, let’s say you are selling DSLR cameras. In a Google Display Network campaign, you can select to display your ad only on those websites or pages that contain certain keywords or topics. In your case, the keywords could be how to become a photographer or DSLR camera for beginners. By doing this, you’ve made sure that your ad is shown to the right people.
More than that, you can choose to display your banner only on certain websites or blogs. If you know some great quality websites or blogs that your buyer persona might visit, you can include those in your settings.
In this way, your banner doesn’t interrupt people from spying on their friends (as on Facebook). By contrary, for a person who is searching for advice on how to become a photographer, clicking on a banner which says “DSLR cameras for beginners” is the next natural step.
Not to mention that if you choose to display your ads only on certain websites, and you do the targeting right, your branding efforts will be much more effective since, instead of displaying your ad besides pictures of cats and dogs, you can display it on quality blogs from your niche.
STEP 5: Don’t waste your money on existing customers with “exclude converted”
Remarketing our existing customers can be a very efficient way to increase sales. For example, if someone already bought a vacuum cleaner, you could follow up with a banner promoting vacuum cleaner filters with a discount.
But sometimes, your existing customers can also make you lose money. For example, if someone already bought a product from you, it would be useless to hit them again with the same banner promoting the same product.
The solution, in both Google Ads and Facebook, would be to exclude people who already converted. You can do this very simple by excluding people who reached the “Thank you!” page.
STEP 6: Use Facebook to find more “brand evangelists” with “Lookalike” on an email list
You probably have a bunch of people who open and read your emails more frequent than others among your newsletter subscribers (if you don’t have a newsletter, I recommend you to create one). Those are the ones who are more likely to buy from you or they are already loyal customers.
You can use Facebook to find more people with similar interests and behaviors with the people we’ve just talked about.
Here’s how:
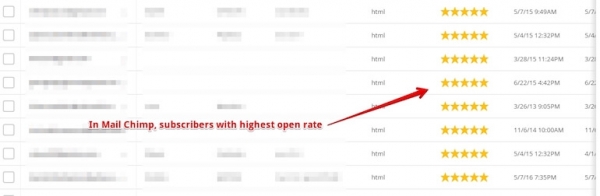
First of all, go to your email marketing solution (in this example I’ll use MailChimp), find those subscribers who have the highest open rate and click-through rate and export them to an Excel document.

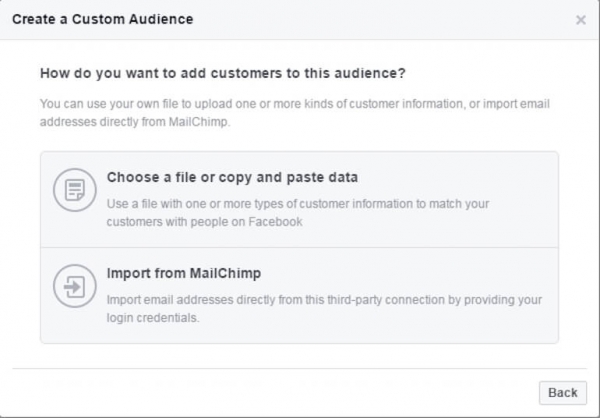
Further, go to Facebook and create a custom audience importing the email list created earlier.

And the last step is using the Lookalike audience option to find more people with similar interests and behaviors with those in your email list.
Conclusion
If there’s something I would like you to remember from reading this article, is that creating great ads is just a part of the process. The other one, and equally important, is displaying them in front of the right audience. By using the tactics above not only will you save a lot of money, but you will also find new very qualified potential customers.